Glue guns for ALL! I love our low-temp hot glue guns that we have in the studio. So I will proudly allow most all ages use them because hot glue guns for kids is a game-changer.
Why? Well, for a couple reasons:
One, because they are an incredible tool for building. Sometimes, hot glue is SERIOUSLY the only thing that’s going to get the job done.
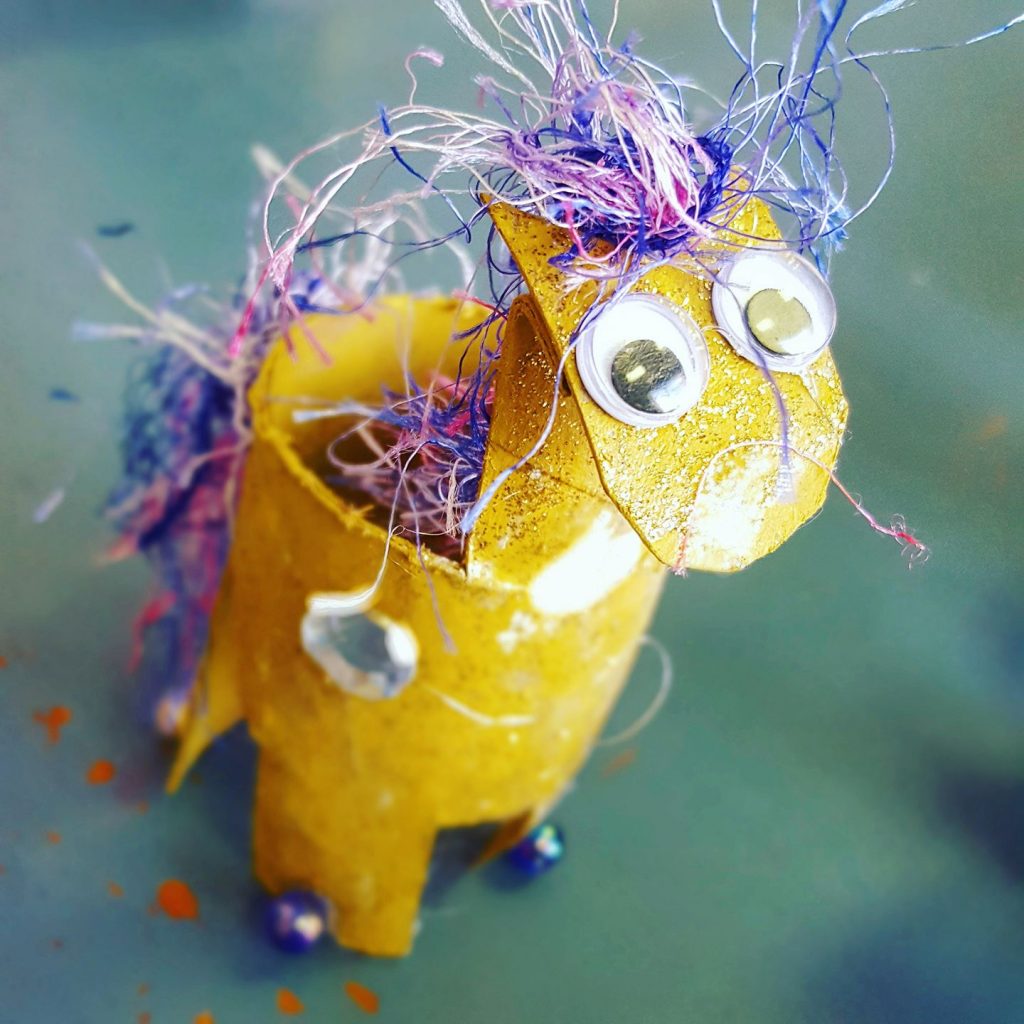
Cardboard Unicorn Craft made with hot glue
And, two, I love them…because they are slightly dangerous.
Risky, slightly dangerous situations provide important learning opportunities AND they create interest and excitement. Accomplishing (conquering!) that dangerous situation builds confidence. Children learn about their own abilities and sensibilities.
In the studio–whether its glue guns or power tools or hot wax for kids–we always review the safety instructions. And, we never make a student use something that he or she is uncomfortable using. But, given the opportunity and the proper guidance, you might be surprised what these young people are capable of!
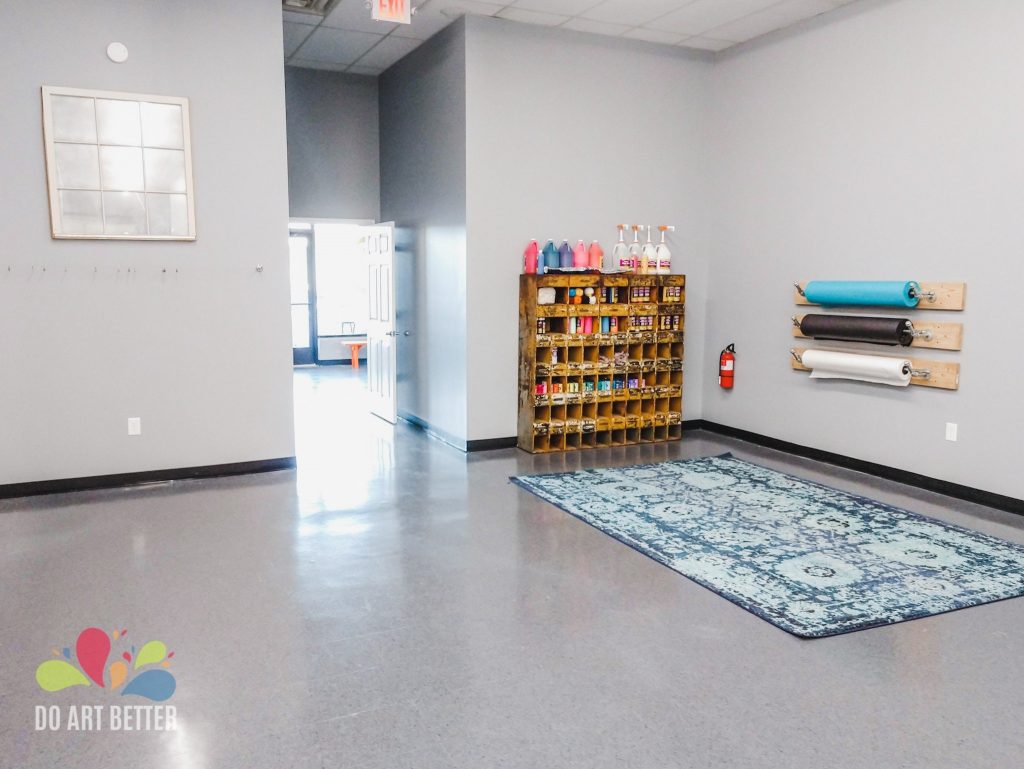
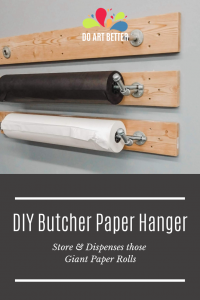
Hi everyone! Our newest art studio has been open for nine months, and I’m finally getting around to writing about some of our construction projects! First up, I want to show you how we built our own DIY holder for butcher paper. I love this storage and dispensing solution for those big, heavy rolls of butcher paper!
This post contains affiliate links.
I know you can purchase s for these paper rolls but they take up floor space and I didn’t want to be moving them around all the time. Couple that with the fact that most storage solutions were pretty expensive, and that naturally led us to creating our own solution.
I’m very pleased that our DIY holder for butcher paper here cost us only about $200.
DIY Supplies:
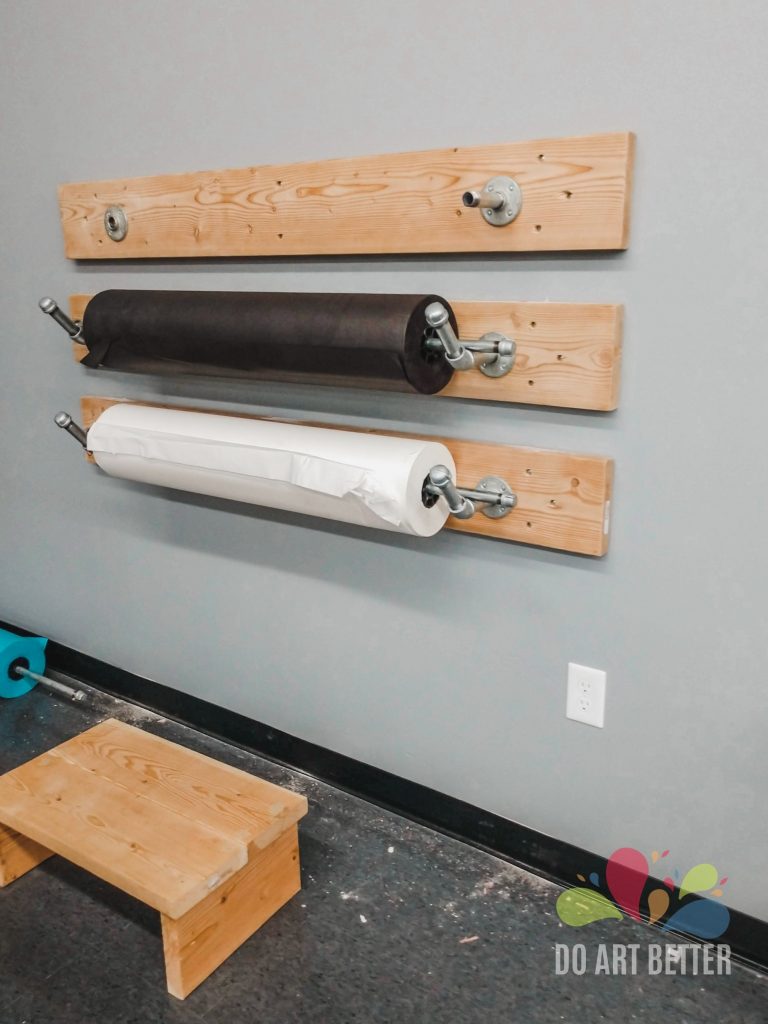
Wood boards – you will need one board for each roll of paper. We cut our boards to 60″ because are 36″ long. The wood is a common 2×8 (in actual dimensions, it’s 1.5 inches thick and 7.25 inches wide).
[ BTW, ]
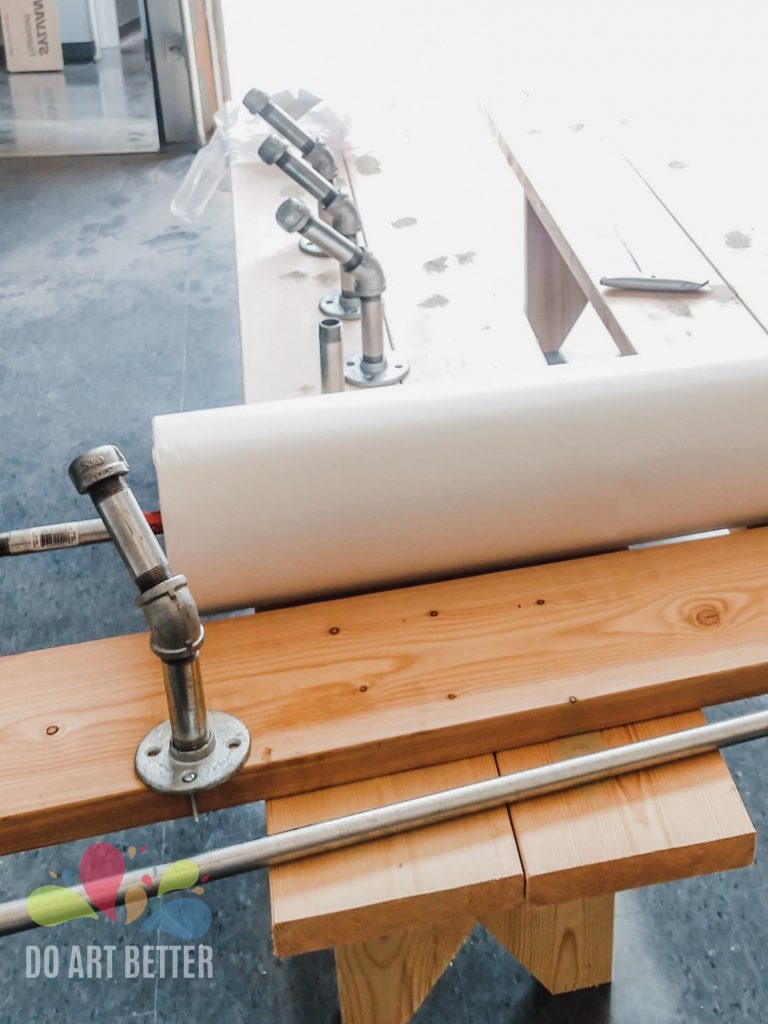
Pipes – one full “set” for each roll of paper. We bought all our pipes at the hardware store already cut to the appropriate length and already threaded! See the breakdown below.
Galvanized Pipes (one set per roll of paper)
floor flange, 3/4in (2)
45° elbow, 3/4in (2)
cap, 3/4in (2)
3/4in x 4.5in pipe (4)
1/2in x 48in pipe (1)
1/2in cap (2)
Hardware (one set per roll of paper)
Wall anchors (8)
5″ screws to go into the wall anchors or the wall (8)
washers (8)
1in screws to attach the floor flanges to the board (8)
Putting it together
Step One
We began by cutting, sanding, and lightly staining our boards. You could paint them too if you prefer that look. Personally, I love the raw wood + metal.
Step Two
We measured and drilled pilot holes for all the screws.
We positioned the floor flanges 40″ apart and centered them on the board both vertically and horizontally.
As far as the load-bearing screws that had to hold this sucker to the wall, we decided to use three on each end (outside of the floor flange) and two right in the middle. If you have the option to drill into studs instead of wall anchors, you might want consider positioning screws based on their locations instead! (Our building is metal studs so that is an option for us)
Miss Sam got fancy and sunk our wall screws down into the boards using a large drill bit. Totally not necessary but she is advanced like that 😉
Step Three
Next, we attached pipes to the boards. We began with the floor flanges, and then attached the remaining pipe assembly to the floor flanges.
Step Four
For the final step, we screwed everything to the wall. This was a two person job.
We used a level to position our boards and marked their position with a pencil. Then, we used a small drill bit to drill through our pilot holes in the board and make a mark on the wall where we needed to put the wall anchors.
After pounding in the wall anchors, we returned the board to the marked position and screwed it into place using the giant screws and washers. We only missed the wall anchor a few times! When that happened, we just had to back out the screw and try to re-position the board more accurately. Out of 24 chances, I figure three misses isn’t too shabby! Good thing no one is seeing the wall behind these boards, right?!
Hanging the butcher paper
Once the boards and pipes were up, all we had to do was add the paper. The long 48″ pipe slides right through the center of the roll. We attached the caps on the ends which keep the paper from sliding off the pipe and keep the pipe from shifting out of the cradle.
The paper dispenses easily right from the wall, but its also really handy sometimes to just carry the whole roll (on the pipe) where you need it.
Overall, I couldn’t be more pleased with our DIY solution! This butcher paper holder is JUST what we needed on our walls!
Got questions for me about this project? Leave them in the comments or send me a note on social. I’ll do my best to answer! (Keep in mind…not a contractor or builder…just an artist who will DIY anything…)
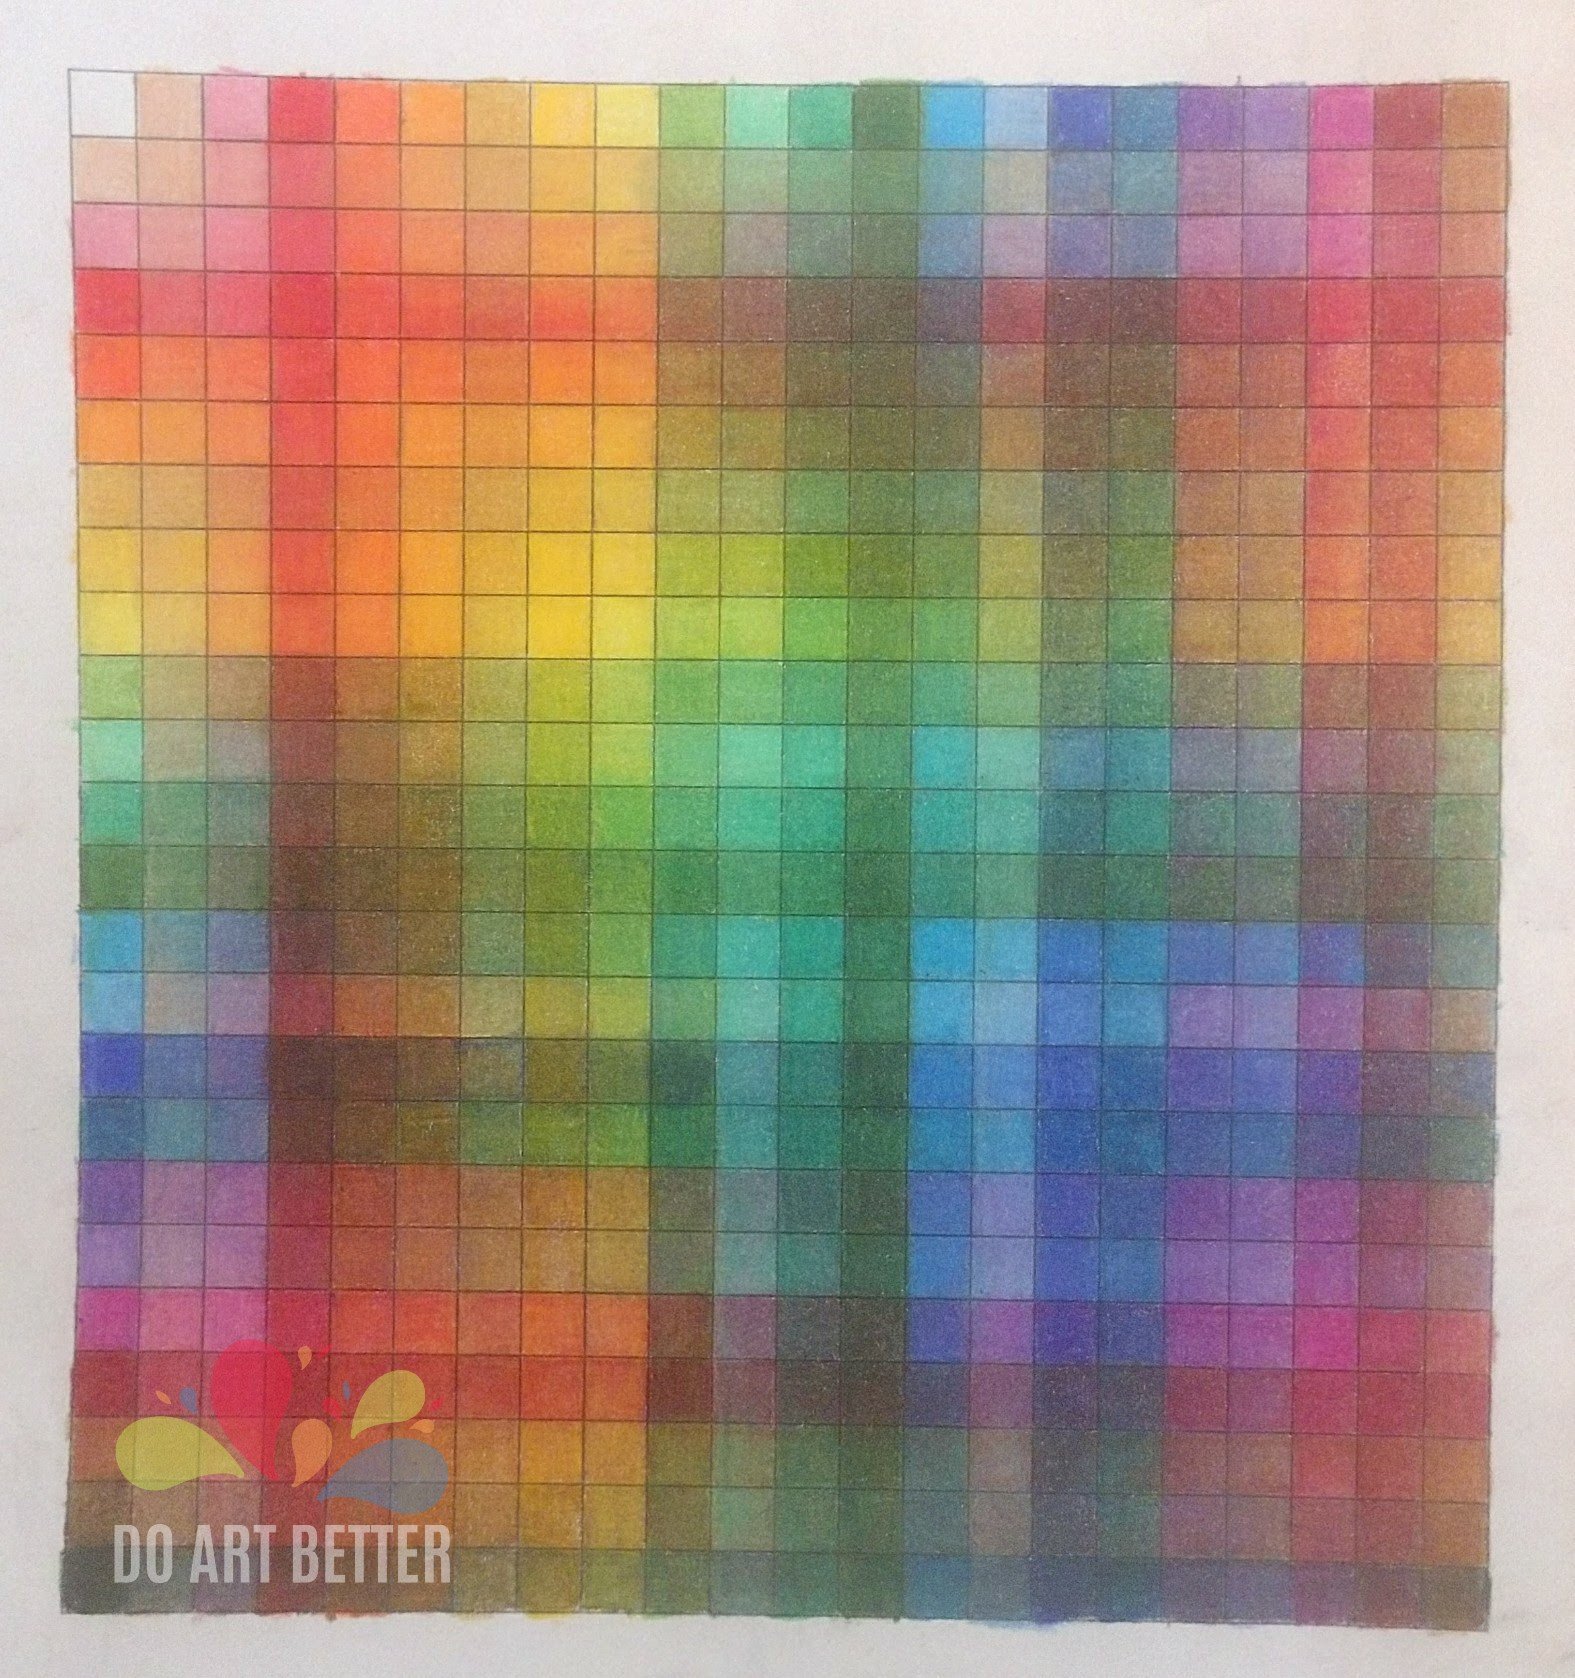
Today I’m sharing an exercise to practice color pencils techniques such as blending and burnishing. I find completing these forms to be so relaxing! It’s the type of practice that you can work on just alittle bit each day whenever you need a brain break!
I’m using Prismacolor brand pencils for this color grid.
The finished product makes a great reference tool for colors!
Begin by figuring out the order of your pencils. You can do them in rainbow order, a random assortment, or whatever organization method makes sense to you. For my example, I used my pencils in the order that they came in the box!
Whatever order you choose is, make a note of it so you remember! It doesn’t matter how many colors you have because you’ll start back over at pencil #1 when you reach your last one.
In progress. This is my adult coloring class that we held at the neighborhood brewery!
Starting with pencil #1, lightly color the entire first column from top to bottom.
The key here is to color LIGHTLY. We’re going to be building layers of color and if you start off too heavy, you can’t get the blended effect of the multiple layers.
Once you’ve got one light colored layer done with pencil #1 in column #1, then you’ll move onto to pencil #2 and column #2. Repeat this step until all the columns are filled. (If you have more columns than pencils, simple circle back around to pencil#1)
After all your columns are filled in lightly, you’ll begin the same process with the rows. Lightly color row #1 with pencil #1. Row #2 with pencil #2. And so on.
When you’ve finished your rows, go back to the columns again.
This is an exercise in patience as well! I think, each of my boxes have 10 layers of color!
After enough layers, you’ll see your boxes begin to look glossy (burnished) and that’s when you know you’re do
Not only is it a relaxing coloring exercise, it produces a pretty cool effect, AND it’s a great reference tool for future color mixing!
Have you ever done a color wheel or color reference exercise that you love? I would live to hear about!
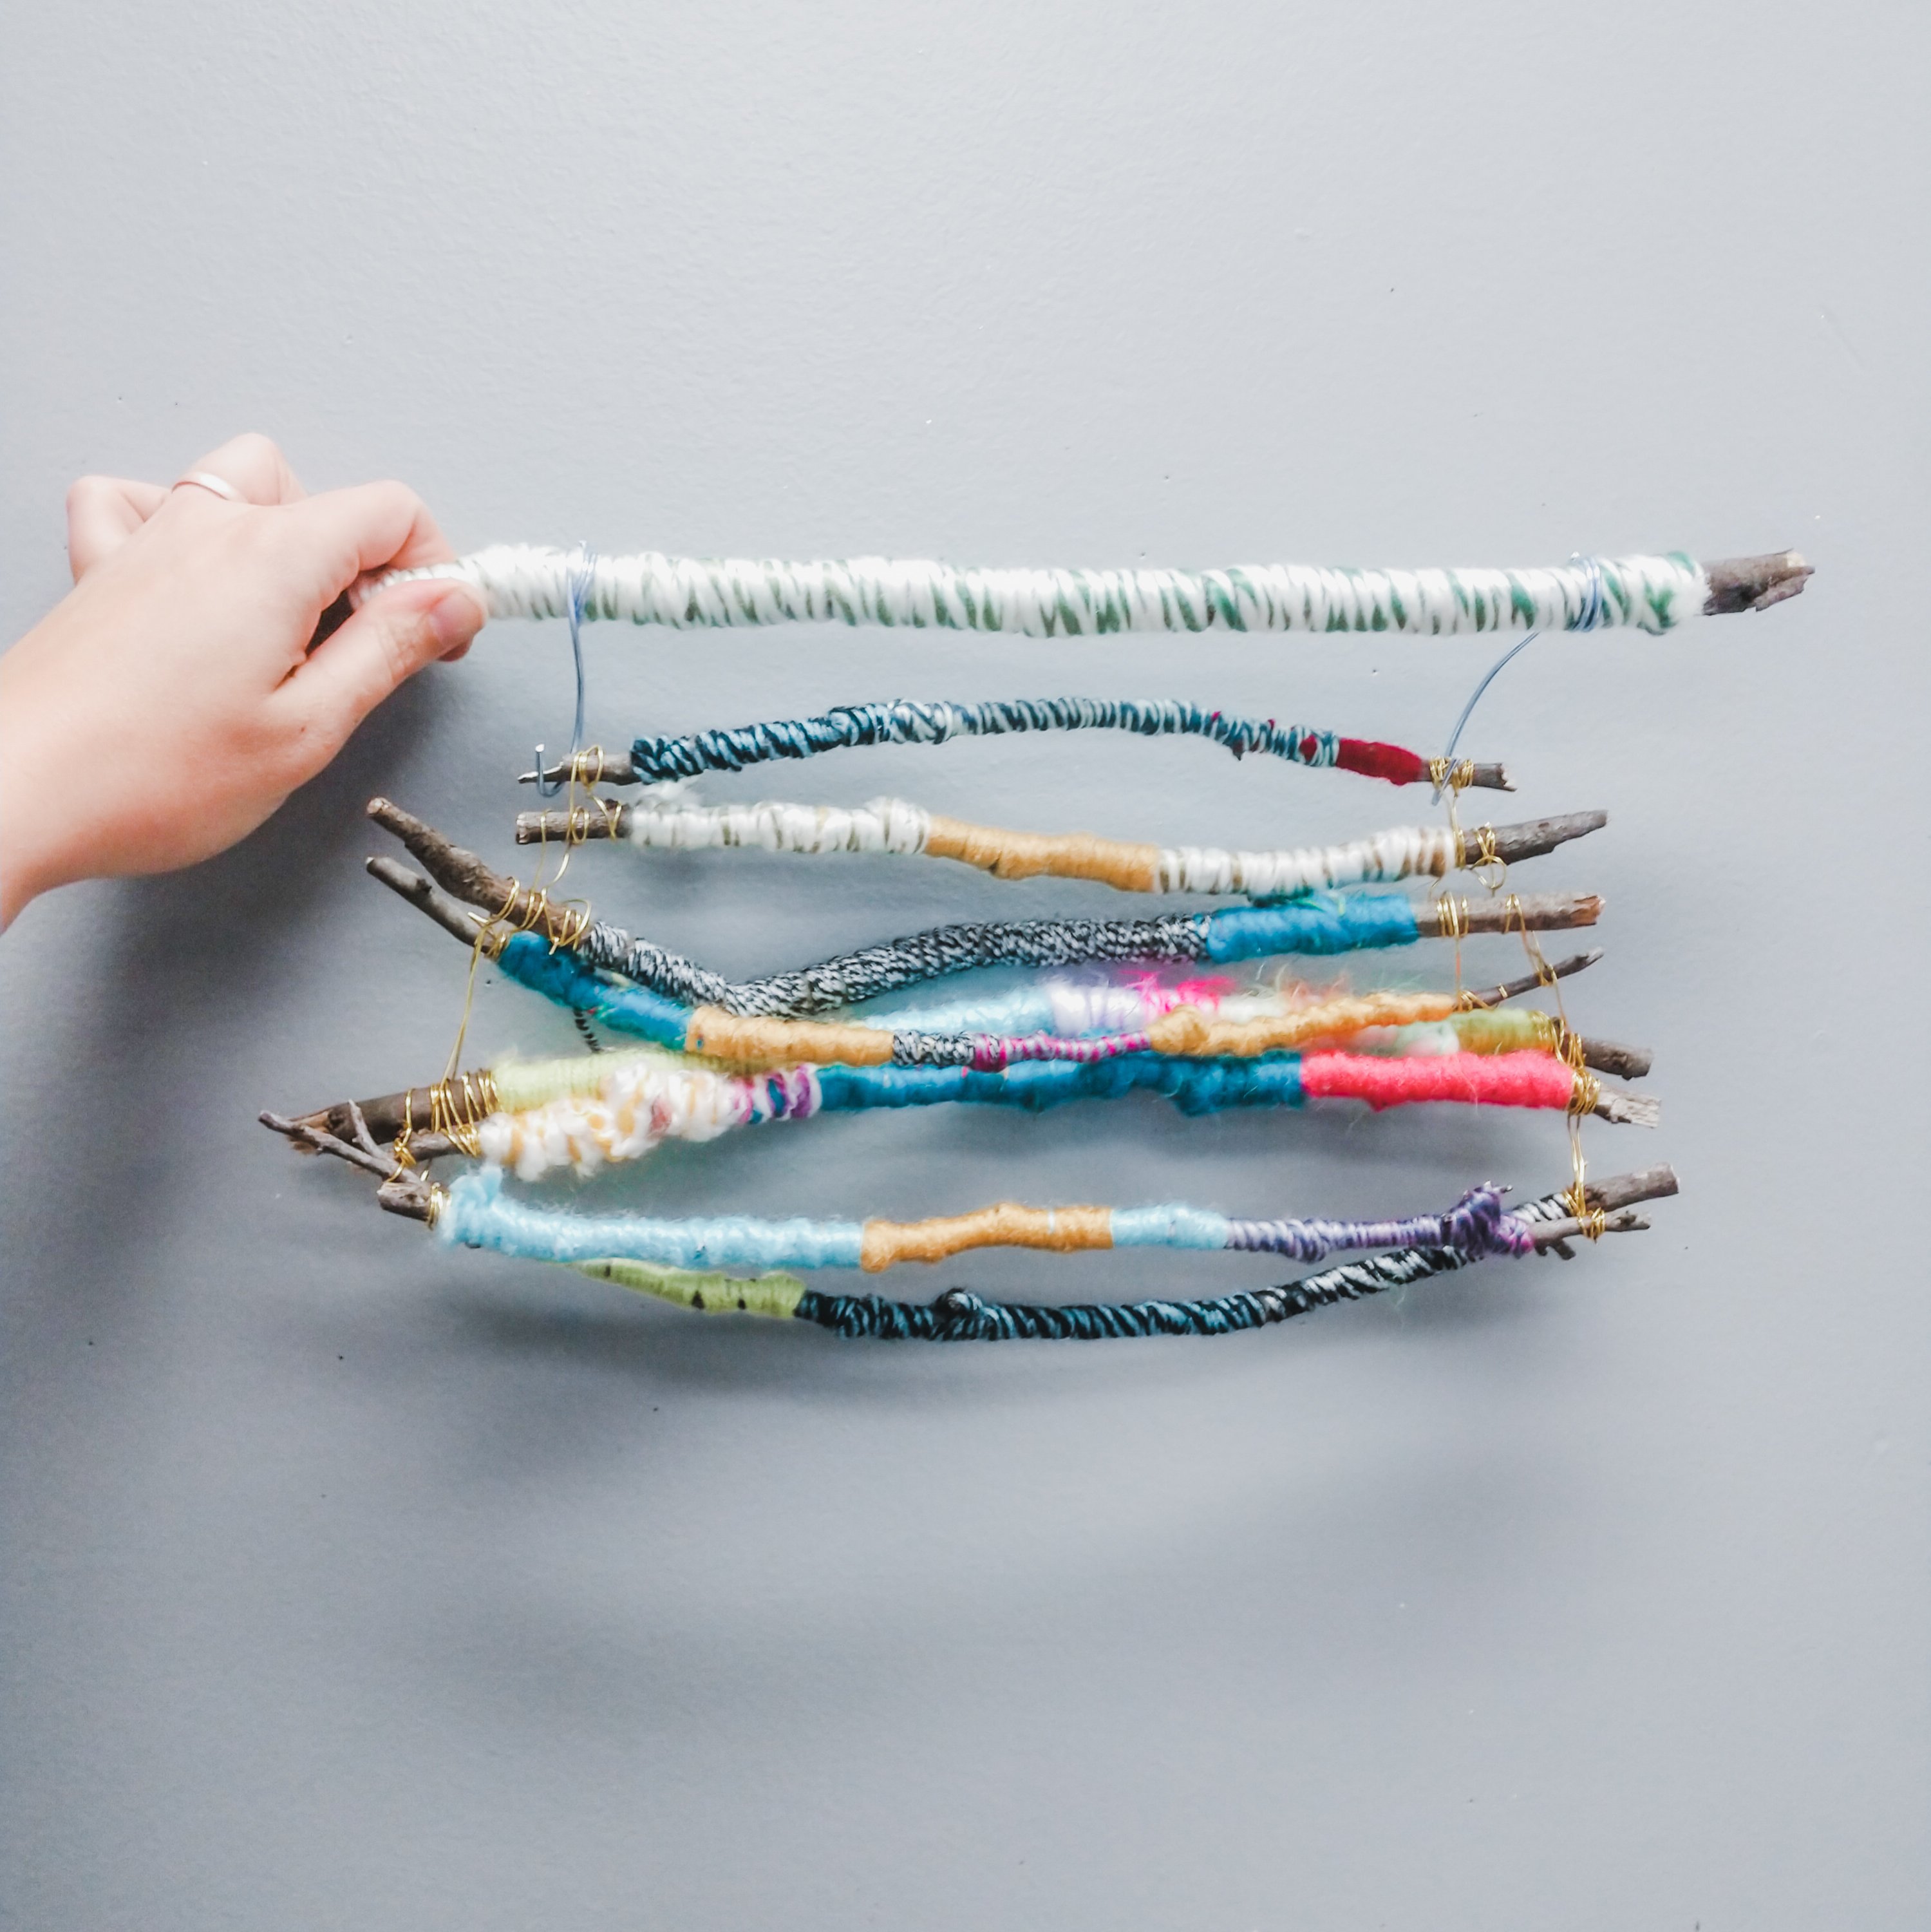
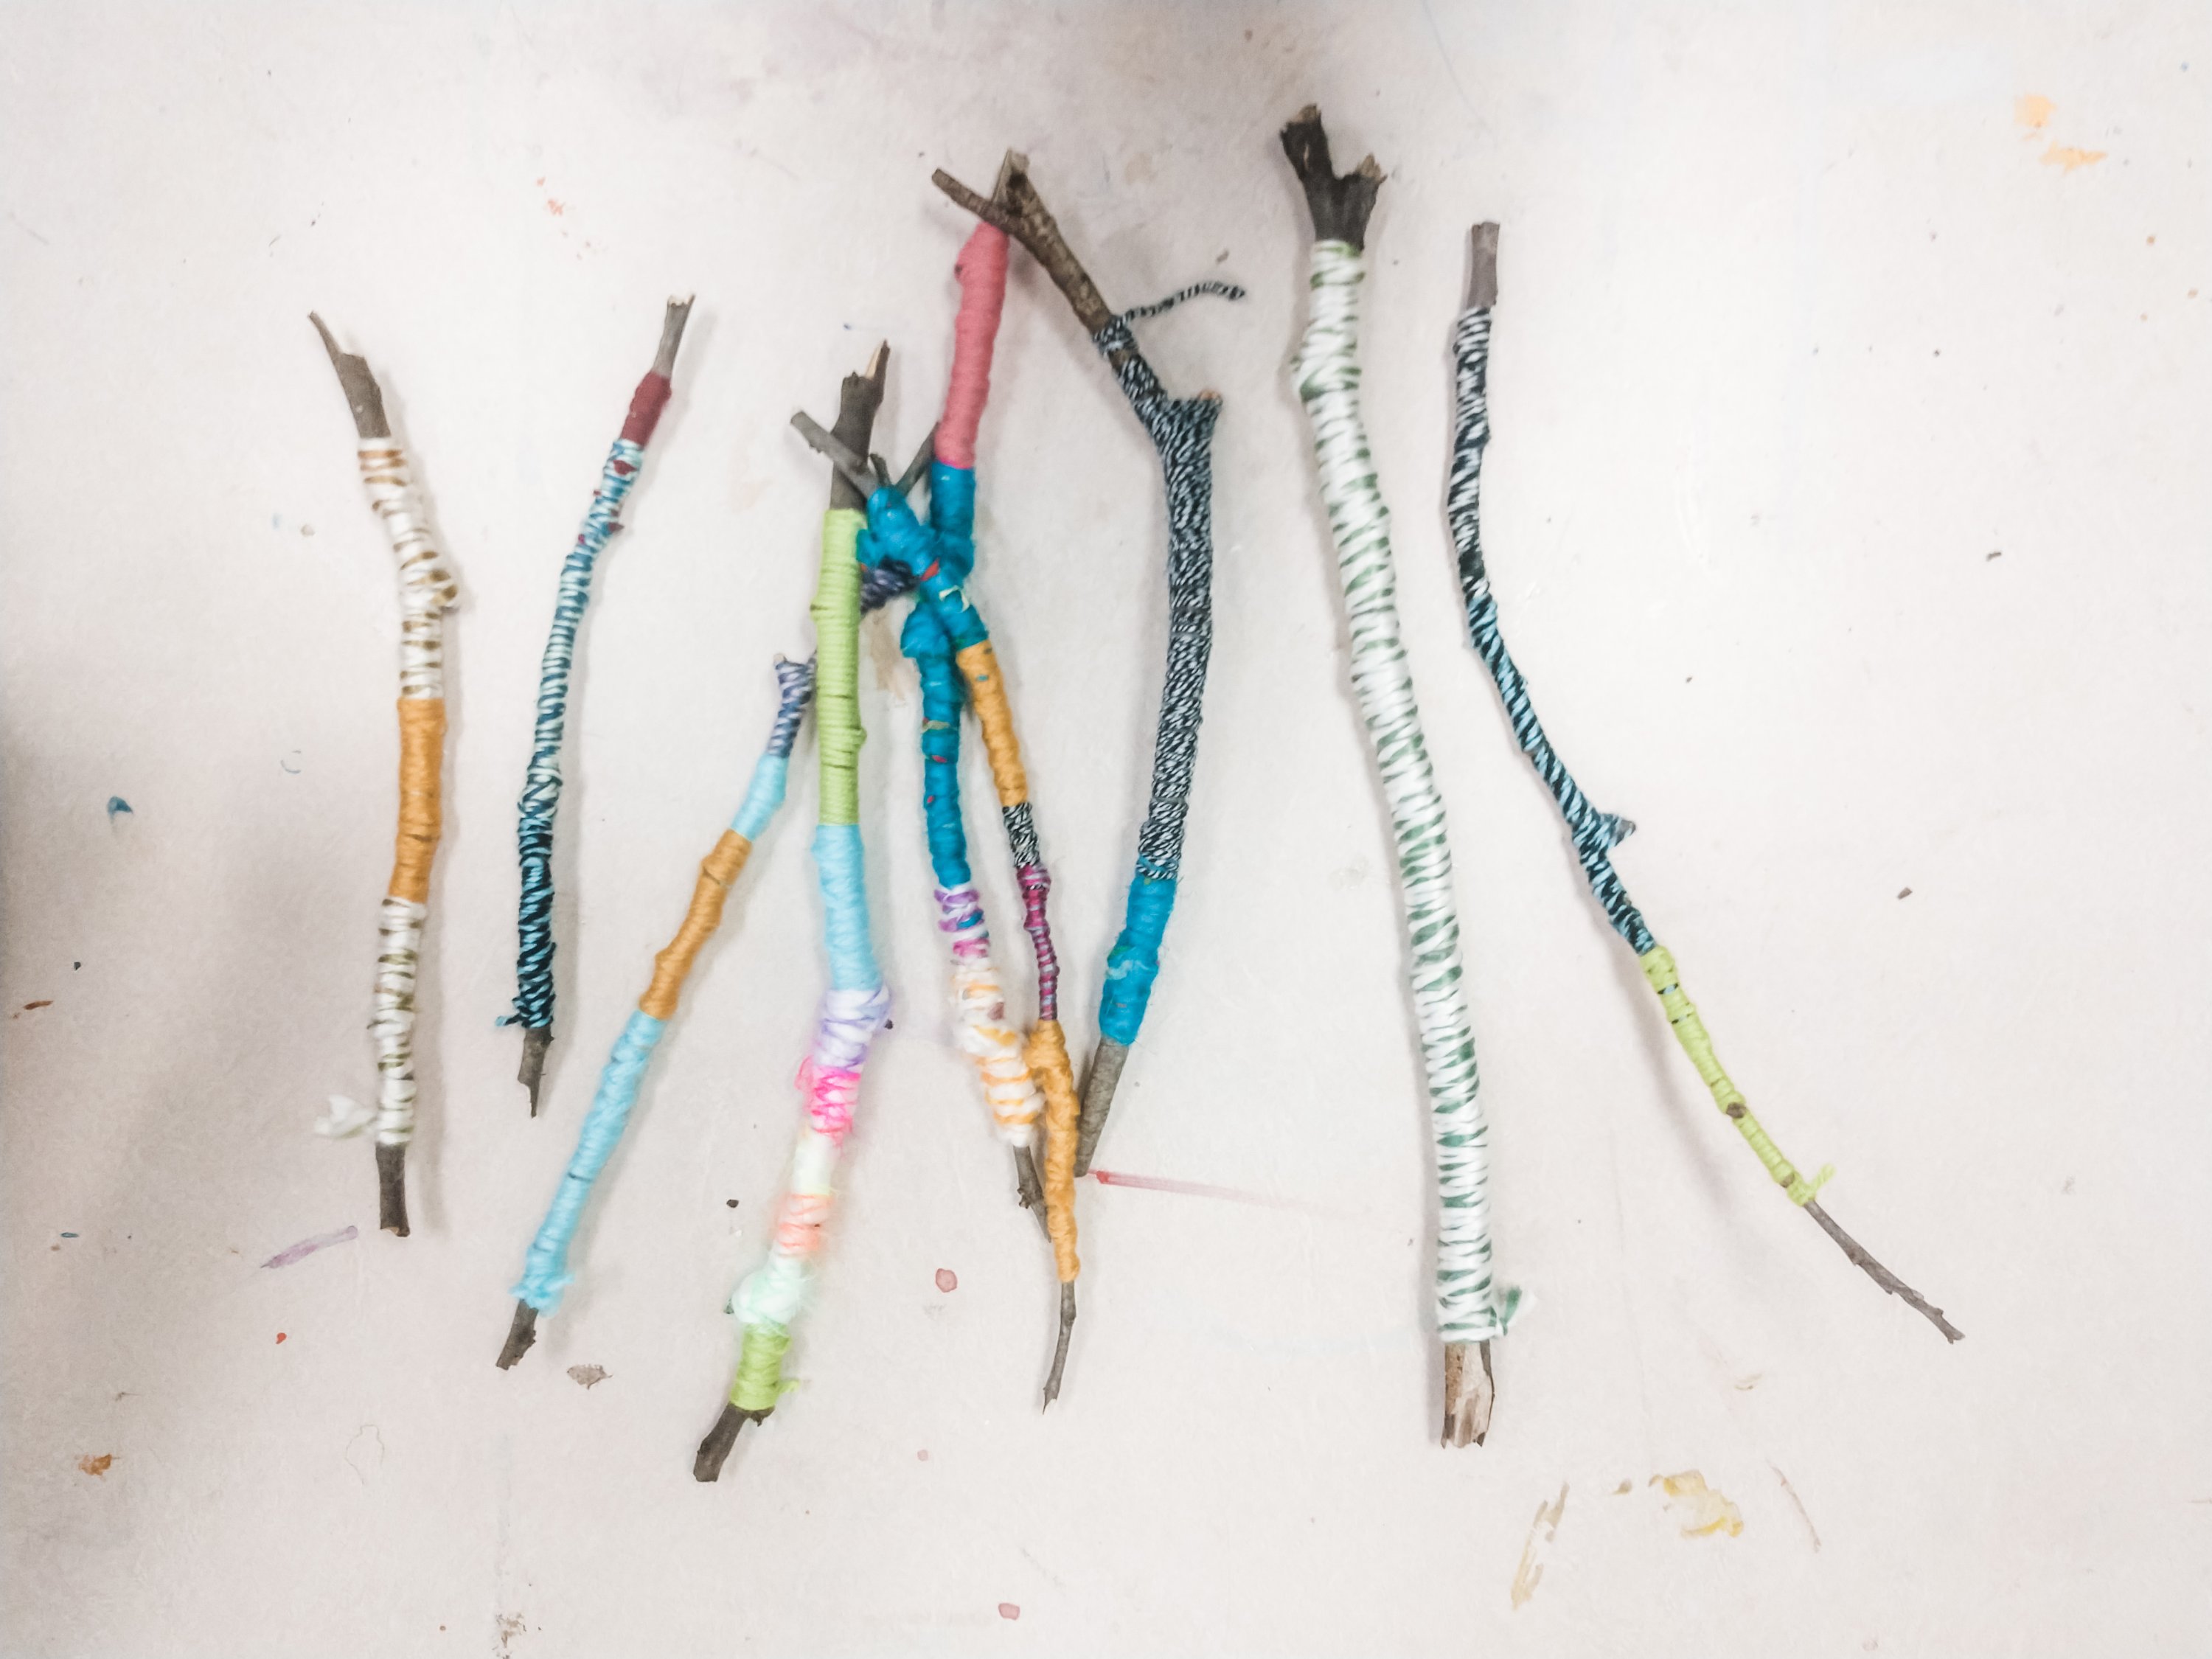
So, I have a vision for these babies.Yarn Wrapped Sticks
These sticks are about 10 inches long and nothing special. I collected them from my yard and wrapped them in some of our colorful yarn.
Collaborative Art Project
Later this month, we have the honor of participating in a local elementary school’s 5th Grade Celebration. This will be the fourth year we’ve traveled out of here studio to create something special with the graduates.
Last year we did a collaborative ocean-themed printmaking project.
Collaborative Ocean Tapestry
This year, I want to do wrap sticks and weave them into a giant “tapestry.”
Here’s my test so far with just nine practice sticks.
I’m using a fine aluminum wire to bind them together in a figure-8.
So far, I’ve learned that I need to find straighter sticks!
Can you imagine what this will look like with 120 sticks?! (Mostly likely 3 “ladders” of 40 that we’ll weave together after they are all complete.)


![Printing with kids on canvas - fish and underwater creature tapestry [DoArtBetter.com]](https://doartbetter.com/wp-content/uploads/2019/05/lrm_export_220794329940369_20190503_1352319311763780803027578116.jpeg "Printing with kids on canvas - fish and underwater creature tapestry [DoArtBetter.com]")